
Tools guides
EMT spacer markings: center-to-center spacing explained
Understand EMT size labels, center-to-center measurements and the clear gap between conduits, with the YENDRE six-piece spacer chart.
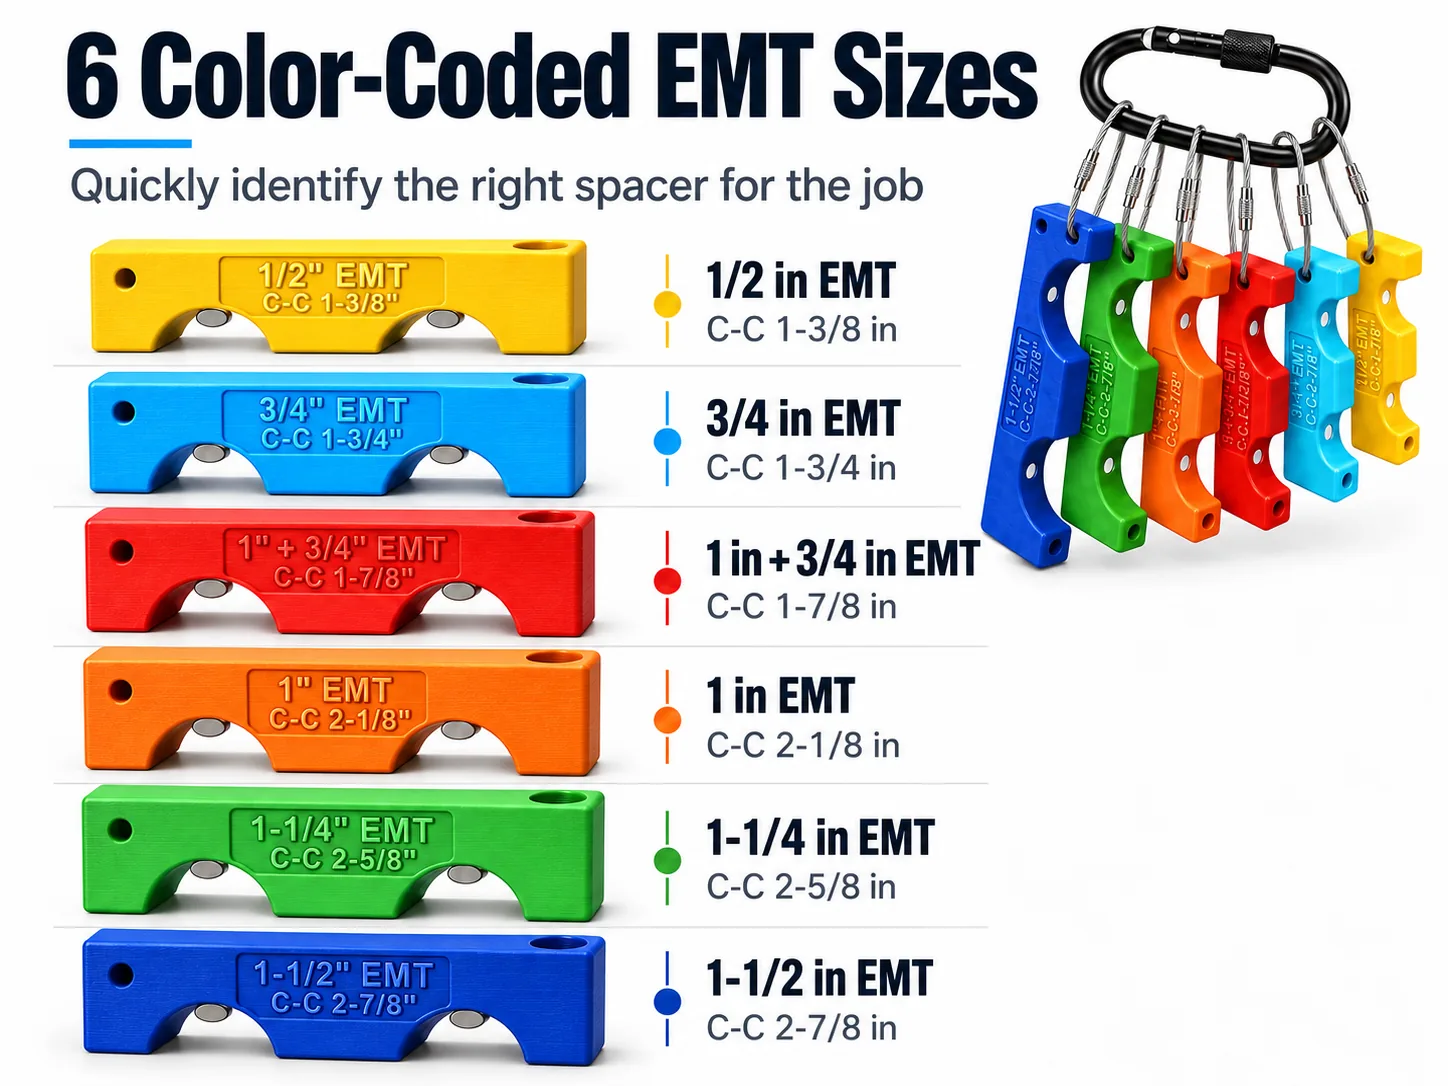
The two numbers on an EMT layout spacer answer different questions. The conduit label identifies the intended conduit size or pairing. The center-to-center label, often shortened to C-C, identifies the separation between the two conduit centerlines.
Conduit size is not center spacing
A yellow spacer in the YENDRE six-piece illustration is labelled 1/2 inch EMT and C-C 1-3/8 inch. The first label is the conduit designation. The second is the preset spacing shown for that piece. Neither label should be treated as the clear air gap between the outside surfaces.
Read the six-piece product chart
| Color | EMT label | Center-to-center label |
|---|---|---|
| Yellow | 1/2 in | 1-3/8 in |
| Cyan | 3/4 in | 1-3/4 in |
| Red | 1 in + 3/4 in | 1-7/8 in |
| Orange | 1 in | 2-1/8 in |
| Green | 1-1/4 in | 2-5/8 in |
| Blue | 1-1/2 in | 2-7/8 in |
These values are transcribed from the current product illustration for the six-piece, two-conduit option. The red piece is labelled for a mixed 1 inch and 3/4 inch pairing. Check the physical marking and selected option rather than assuming that a color has a universal meaning across tools or manufacturers.
How center spacing relates to the clear gap
For two round conduits, the clear gap is the center spacing minus half of each conduit's actual outside diameter:
Clear gap = C-C distance − (outside diameter A + outside diameter B) ÷ 2
If the conduits are equal in outside diameter, that simplifies to center spacing minus one outside diameter. Use measured or manufacturer-specified outside diameters in the same units. A nominal trade size is not a measurement of the actual outside diameter.
Check the layout instead of assuming compliance
A spacer repeats its own geometry. It does not decide which separation your project needs or whether a support arrangement is suitable. Compare the preset dimension with the project drawing and the relevant installation requirements before selecting a piece. This guide explains product markings; it is not an electrical installation specification.
Next, compare the available spacer sets or view the YD0053 product and option selector. The layout checklist helps separate fit, measurement and positioning checks.